Elite Esports Bicycle Racing: How to Set up and Use Dual Power Recording for Performance Verification
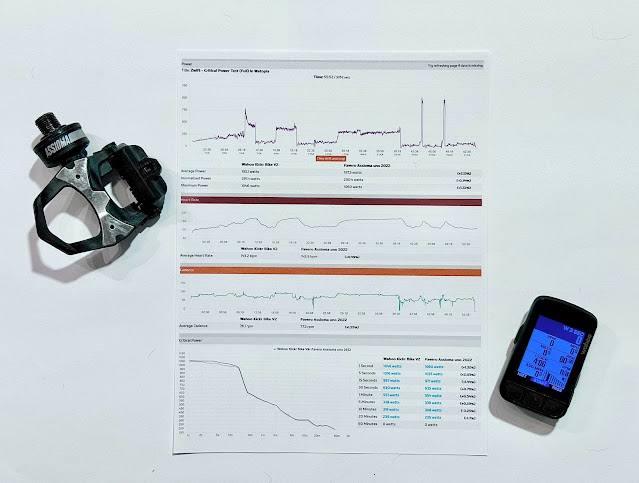
How can you tell if an esports cyclist’s race results are legit? While there are MANY ways, this article focuses only on the method of “dual power recording” - the practice of recording and comparing power data from two different sources: a smart trainer (primary) a bike-based power meter (secondary). Using two sources for recording power data helps to verify that the power readings are accurate and consistent, discourages cheating through data manipulation or just poor data quality. Dual power recording (or DPR) is especially important for top-level Zwift (and other esport platforms) racing, as it can streamline the performance verification process and increase the transparency and fairness of the competition. In this article, I will explain what dual power recording is, how it works, and why it is essential for elite Zwift racing. I will also show you how to create your own dual power recording and upload it to ZwiftPower.com, a website that analyzes and displays Zwift race results.
DPR CATCHES DISCREPANCIES
As noted above, one of the reasons why DPR is necessary for virtual bicycle racing is to ensure fair competition and prevent cheating. Without DPR, some unscrupulous riders might be tempted to connect a battery-powered pedal assist bike to their smart trainer, which would artificially inflate their power output. A secondary power source recording would help catch this through data discrepancies between the two power files.
Another form of cheating is using a technique known as "sticky watts," which refers to exploiting the delay between the actual and the displayed power output on the screen. Some riders are able to do repetitive short bursts of power followed by brief stops in their pedaling; Zwift (and another esports cycling programs) processes the data in such a way that the wattage reading in-game gets "stuck" on a particular wattage for 3+ seconds which can happen when using some smart trainers and especially for pedal/crank power meters that are wrongfully paired as the primary power source (See Rule: 2.5.1). Sticky watts can give the rider an unfair advantage because they do not get as fatigued as a rider who is not doing this; the sticky watts rider can coast at high speeds without pedaling, or maintain their position in the pack with less effort. Since only the primary power meter (aka the one that is integrated into the smart trainer or smart bike) should used for the game/program, the secondary power meter is always used for verification purposes only. By using dual power recording, riders using the sticky watts technique can be easily detected and removed from the results because the data from the secondary source will not match the power data recorded by the smart trainer.
EQUIPMENT NEEDED FOR DPR
Your smart trainer or smart bike is your primary power data source and must be connected to the Zwift game client as the controllable device. For DPR riders must record a second source of power data (e.g., power meter) in addition to the primary source. The secondary power data source must be paired with and record its data to a cycling computer.
To set up this secondary power recording, you will need two devices. First, you need a power meter that is either (1) built into one of your pedal(s) or is attached to your bicycle’s (2) crank arm or crank spindle. Second, you need a bike-mounted computer that can both capture and displays various data such as power, duration, cadence, heart rate [when outdoors, these computers record additional data such as speed, distance, elevation and even temperature]. Both the power meter and the computer need to be able to transmit data wirelessly using either ANT+ or Bluetooth protocols.
There are many options for power meters and bike computers on the market, ranging from budget to premium models. Some of the most popular and reliable brands are Favero Assiamo, Magene, 4iiii, Stages, Garmin and Wahoo.
POWER METER PEDALS: If you are looking for a reliable, accurate, and easy-to-use power meter pedal, it is easy to recommend the Favero Assioma Uno. Here are some of the reasons why:
Relatively Low Cost (<$500), ±1% accuracy, easy to use and quick to travel with or transfer to another bike.
Assioma review/description/test video: click here.
CRANK POWER METERS: I am not familiar enough with any of these to make a recommendation.
BIKE COMPUTERS: If you are looking for an excellent bike computer, it is easy to recommend the Wahoo Element Bolt. Here are some of the reasons why I recommend it: relatively low cost (~$280), connects wirelessly to your smartphone and other devices via Bluetooth or ANT+, and supports a wide range of sensors and platforms such as power meters, heart rate monitors, Zwift, TrainerRoad, Strava and more and can be set to automatically upload .fit files to multiple apps, customizable data displayed, gps for outdoors, rechargeable battery and super easy to transfer among multiple bikes. Wahoo Element Bolt V2 video review/description/test video: click here
INSTALL AND SETUP DEVICES
Install your power meter and cycling computer on your bike(s), per their instructions, charge both devices, install the appropriate apps to pair the devices and check for updates. When setting up your bike computer it is helpful to enable “Automatic upload” to effortlessly send your recorded workouts to authorized websites/apps such as Strava, Dropbox, etc. when paired to your smartphone. Please use 2.4G Wi-Fi only for pairing because 5G is non-compatible. You can copy your .fit file from the websites that you have authorize or from the Element app that is labeled “History”, and then select “Share” to export or email it to yourself. To direct connect to your computer via USB cable please see this video. Pick the quickest and easiest for you. Personally I auto upload to Dropbox and from there send it to “Files” which is available on all of my devices.
STEPS FOR UPLOADING DPR
Login in and go to your ZwiftPower “Profile” page and select the following actions listed below:
- “Analysis
- “Create New Data Set”
- “Use .fit file from Zwift Activity”
- “Choose Power Choice” Type in the brand/model of your smart trainer (saved as shortcut for future uploads)
- “Assign to a Zwift Event you entered” choose the same Zwift race/event that matches step 3
- “Choose File” find and select the .fit file from your secondary power meter that you uploaded to your computer
- “Choose Power Choice” Type in the brand/model of your bike’s power meter (saved as a shortcut for future uploads)
- “Visibility” Select “Public”
- “Create Data Set”
- “Time Shift and Crop Tool”
- Not required, but helpful for viewing. Allows for syncing the timelines and removing recorded data outside of the race/event’s timeframe
- “Settings”
- “Save”
Wow! That’s a lot right? The good news is that the effort is worth it for you both as tool for evaluating your performance and most importantly for the credibility of esports bike racing. All the hard work is in the setup and performing your first dual power recording. Future DPRs are extremely easy and quick. I highly recommend doing DPRs for all of your virtual races to make it habit so that when a big event requires DPR you will not have unexpected problems.


Comments
Post a Comment